Showing posts with label Upcycled. Show all posts

Saturday, February 11, 2012

Plant Inspired Wall Art


The inspiration:

I found this over at Home Made Simple and fell in love. I thought it was so cute and it looked pretty easy. So I decided to take a stab at it with a few slight variations. I found the frames in the trash and my mom was planning on throwing away the mirror so I snagged it. I spray painted the frames white and used craft paint to paint the mirror's frame yellow. A little paint can go a long way in transforming outdated things!

First, gather your supplies. You'll need two pieces of cardstock (a top color and a bottom color) and some frames. An x-acto pen and cutting mat are helpful, but scissors will probably work too.


Sketch out a plant design. It does not have to be good. I am not very good (read: terrible artist) and I still managed to make it work. You just a general outline of what you want to do. Then, use your x-acto knife to cut out your shapes.

It doesn't have to be perfect, since you'll be flipping the paper over. Nobody will now that you strayed from the path just a little! 

Once everything is all cut out, layer up your papers, stick 'em the frame and put them up! 

I like the way the mirror looks added in with the nature-y art. This was a super easy project that really ads some flair to a boring wall. I had a lot of fun making it and since I'm not naturally artistic, it turned out way better than expected!
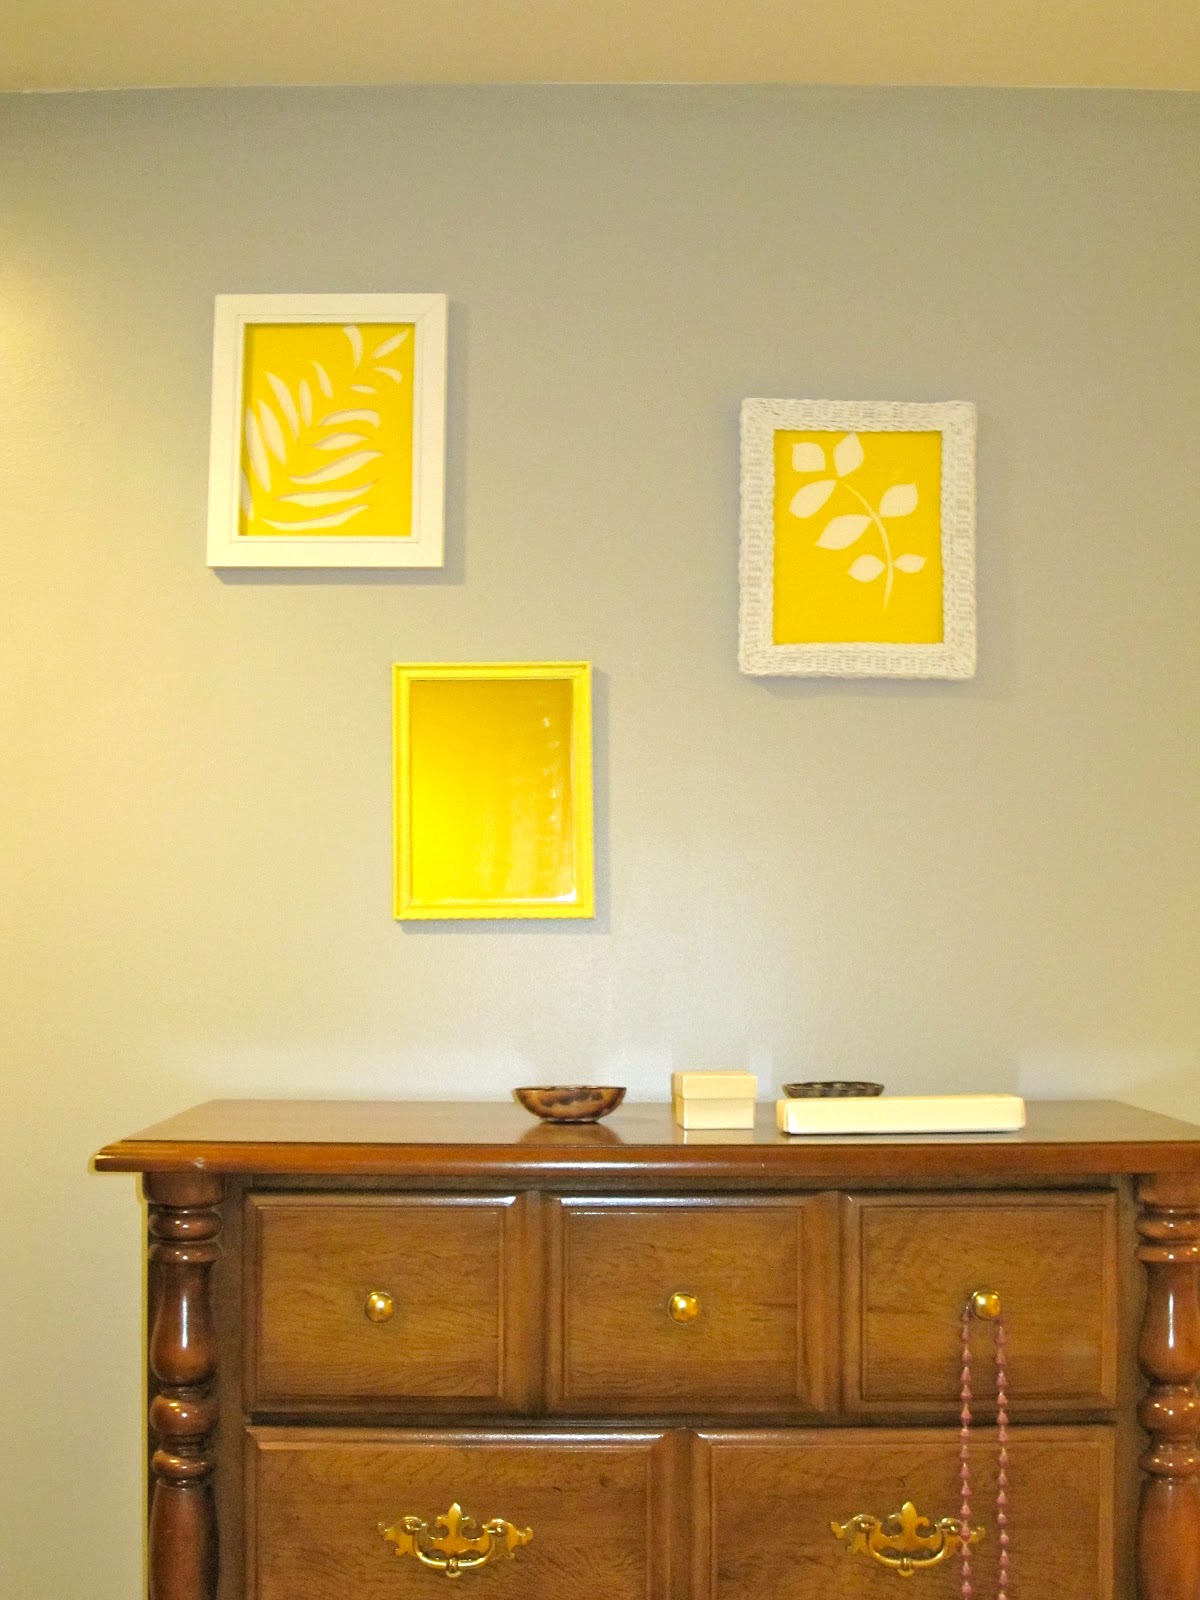

Keep in mind where you are going to hang these when finished. I hung it up opposite a yellow wall, so the mirror just looks like a yellow square. It will be moved to a new home eventually.
Happy crafting!


Featured at:



Linking up at:


Tuesday, February 7, 2012

Cheese Grater Earring Holder

The inspiration:

My jewelry is a mess. My earrings are in a necklace box and my necklaces are scattered all over the place. I needed some organization in my life. I saw the wonderful idea of using a cheese grater to organize dangly earrings pinned all over pinterest and decided to make one for myself.

It is super easy. Anybody can do this adorable DIY organizer! The hardest part is finding a cheese grater. New ones can be expensive, so I just waited it out and found one for $2 on craigslist.

Spray paint your cheese grater.

Ta-da! World's cutest earring holder!

And another pulled back shot of what it looks like on a dresser.

Still adorable. My stud earrings and necklaces still need some work though. Any suggestions???


Saturday, February 4, 2012

Sweater Refashion-- Hat and Mittens


The inspiration:

It is very cold out. So I decided to make a hat and mittens!

Out of an old sweater:

Turn the sweater inside out. I used another hat to get the outline and then cut about one inch around the line. I would recommend pinning before you cut so the pieces stay together. I'd also recommend using the bottom of the sweater as the bottom of your hat so you don't have to hem the bottom.


Then just sew that sucker together and turn it right side out!

Try it on for size. See if it has weird ears.

Re-cut and re-sew.


Now onto the mittens. Trace your hand. I was able to get one mitten out of the body of the shirt. The other I had to take from the sleeve, which I cut open and folded in half.


Pin and cut.
Now take the cuff from the original sweater and cut those to however long you want the cuff of your mitten to be.

Now it gets a little complicated. Keeping the mitten pinned, flip it right side out. Flip the cuff inside out, roll it onto the mitten and pin.

Sew together and flip the cuff down.

Flip back inside out and sew the mitten part.

Then do the same thing with the other mitten and voilá!

Warm, cute, homemade and upcycled!! All my favorite things!

I decided to add some fabric puffs to the hat to spruce it up a bit too.

Go start sewing and be warm!


Linked up at:


Big Bow T-shirt-- Refashion

The inspiration:
I found this over at Ruby Murray and had to try it for my self! It was getting pinned all over pinterest and I was finally able to find a tutorial. Ruby's is great, so I don't really think I need to make my own. Here's a few pictures of my version though!


The long sleeve shirt I got from a thrift store for $1.75.


YAY!! A beautiful big bow!

I decided to pin the bows onto the shoulders instead of sewing them. Ruffles tend to get weird and flopping once they go through the wash and dryer, so I figure I'll just take the bows off whenever I need to wash it. I pinned the bows a little above where the sleeve meets the rest of the shirt.


I think it turned out pretty well! Especially for my first T-shirt refashion!